Repository Guide
ScholarWorks
Background and Getting Started
ScholarWorks is an institutional repository for the campuses within the California State University System. It is hosted by the Chancellor's Office, and governed by the Digital Repositories Steering Committee via the Institutional Repository Working Group.
We have a production application, scholarworks.calstate.edu, and a demo site, demo.digital.calstate.edu, available to each CSU campus.
Logins
Logins for the demo site have been distributed to the campus project managers.
Logins for the production site have been set up with your campus credentials. A new user must login to the site to begin depositing new works. If you are new to using ScholarWorks, please contact your campus project manager. If you are in a new role as a project manager, please contact David Walker to get started.
Dashboard menu
From the dashboard menu you will see a screen with statistics for your activity, notifications, depositor proxies, and work transfer requests for the repository manager.
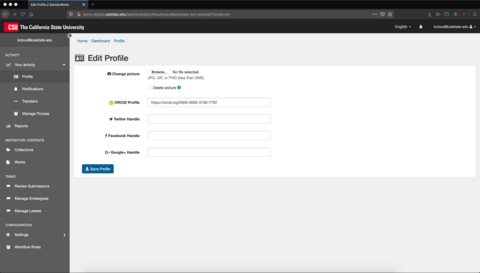
You will also see four main tabs. The activity tab will list user profile information, which may be edited to include user photos and other identifying handles. You will also see the notices for notifications, proxy depositors, and transfers as from the dashboard.
Repository contents
A repository comes in two parts, Collections and Works. Works are the individual items which make up collections, and collections come in two flavors, admin sets and user collections. There is overlap in terminology with DSpace and other systems. It may be useful to check out some of the Samvera/Hyrax links.
By selecting the repository contents tab, and looking at managed collections, you can see the admin set designated for your campus. You can also see the level of access that is provided the user, what kind of collection it is, its visibility settings, the number of items in the collection, and when it was last modified.
For Managers -- the Campus Administrative set
Each administrative set will have a campus name or brief summary. Clicking on the participants tab will allow a manager of that administrative set to view the access for particular users or groups. A manager for the repository has permissions for both the admin set (collection) as well as the works assigned to that set. On this screen you can also add new users to the default three types of participants for the admin set: managers, depositors, and viewers. Depositors have the ability to add new works to the administrative set, while viewers have the ability to view works within hyrax regardless of privacy settings for the item.
The release and visibility tab contains options available to depositors. Release settings can require no embargoes or leases, or a depositor may select particular dates or periods. The visibility settings determine the default, global settings for whether works will be available to view at a private, or institution, or public level.
Lastly, the administrative set will have a workflow associated with it. The workflow tab contains the system-provided workflow defaults for deposit behavior. Currently we have three available:
a default workflow, where if a depositor has permissions may publish a work without mediation
a one-step mediated workflow, where a depositor must have the work approved by a reviewer
A two-step mediated workflow, where a depositor must have the work approved by two reviewer entities
User Roles
User Roles Defined
Users can be assigned three different roles within sets and collections in ScholarWorks:
Manager
Managers can be assigned to individual collections under the “Sharing” tab within the Edit View for the collection. Users in this role can add or remove works in the collection, create or edit metadata for the collection, or delete the collection. Users can be added as managers for the entire campus administrative set under the “Participants” tab when editing the set. Users assigned to this role can add, remove, or modify the roles of other users, edit metadata for works within the admin set, modify visibility settings, add or remove files associated with a work, add new works to the set, and manage the set’s workflow settings, including approving works or requesting changes for campuses using a mediated workflow.
Depositor
Users assigned the depositor role for a collection are able to view the collection, regardless of the collection’s visibility settings, and add works to the collection. Users assigned to the depositor role for the administrative set are able to add new works directly to the admin set.
Viewer
The viewer role allows users to view works within a collection, even if the collection’s visibility settings would normally preclude this. They may not modify metadata or deposit new works to the collection. Users assigned the viewer role within the admin set may view works in the entire set regardless of the work’s visibility settings, including works that are private or embargoed.
Regardless of the role assigned to the user, they will only have that role for works deposited after the role has been assigned. It will not retroactively give the user that role for works previously deposited.
Adding Users and Setting User Roles
Admin Set Users
To set user roles for your campus’s administrative set, navigate from the Dashboard using the “Collections” link under “Repository Contents” and select the “Managed Collections” tab.
Find the collection in the list of "Managed Collections": it has type "Admin Set" and will have your campus name in the title. In this example, the admin set title is "Chico" and it is the set of all works deposited by users from CSU, Chico. Click the name of the Admin Set.
After clicking the name of the Admin Set collection, you can see a list of all its contents and an "Edit" button. Click the "Edit" button.

After clicking the “Edit” button, click on the “Participants” tab. From this view, predefined groups of users or individual users can be added to the collection and assigned one of the three roles described in the “User Roles Defined” section of this guide. To assign individual users, first click the “Search for a user” text box, then begin typing the CSU email address of the user you wish to add. A drop-down menu will search for and suggest participant email addresses, which can be used to select the individual you are trying to add. After you have added the user’s CSU email address, use the drop-down menu to assign one of the three roles to the user. Be aware that they will have that role and the associated privileges for all works in the admin set.
Collection Users
To set user roles for specific collections, navigate from the Dashboard using the “Collections” link under “Repository Contents” and select “Your Collections” to find collections you have created, or “Managed Collections” to find collections created by others that have you in a “Manager” role.
Find the collection in the list of “Managed Collections” or “Your Collections” if it was created by you. It has type “User Collection” and will have the collections name. In this example, the collection is called “Chico State Honors in General Education Capstone Theses or Creative Projects”. Click the name of the collection.
After clicking the name of the collection, you can see a list of all its contents and an “Edit collection” button. Click the “Edit collection” button.
After clicking the “Edit collection” button, click on the “Sharing” tab. From this view, predefined groups of users or individual users can be added to the collection and assigned one of the three roles described in the “User Roles Defined” section of this guide. To assign individual users, first click the “Search for a user” text box, then begin typing the CSU email address of the user you wish to add. A drop-down menu will search for and suggest participant email addresses, which can be used to select the individual you are trying to add. After you have added the user’s CSU email address, use the “Select a role…” drop-down menu to assign one of the three roles to the user.
Content Management
Creating a work (AKA uploading an item or "ingest")
These instructions are for creating a single work. For creating batches of works, see Batch Operations.
Works are items in the repository. They have associated metadata and may contain one or more related files. For example, a single dissertation (PDF and metadata) can be a work. But a dataset containing multiple files (spreadsheets, images, text files and metadata) can also be a work. Works can also have relationships defined with other works.
A user must be logged in to create a work. There are two ways to add a new work:
On the homepage, click “Share Your Work”
From the Dashboard, click on “Works” in the left sidebar menu, then click “Add new work”
Now select the type of work:
Work type 1. Student research (Dissertation, Master’s thesis, graduate or undergraduate project)
Work type 2. Publication (Article, book, conference proceeding, etc.)
Work type 3. Research data (Dataset, model, software, etc.)
Work type 4. Open educational resource (Open textbook, course module, syllabus, etc.)
Any choice will take you to the Add New [Work] interface.
Save Work: Right Sidebar Overview
The right sidebar, “Save Work,” is the first thing to note about the Add New [Work] interface. The top section, “Requirements,” serves as a checklist of what needs to be completed before a work can be saved. The next section, “Visibility,” defines the terms and scope of access. At the bottom is a checkbox acknowledging consent to the Deposit Agreement.
Requirements
In order to meet the requirements for deposit, a work must minimally have:
the required description fields completed for that item type
at least one related file uploaded
the deposit agreement checkbox checked
Once these requirements are completed, the depositor must click “Save” in order to deposit the work. Navigating away from the deposit screen before clicking save will result in the user having to redo the whole deposit process.
Visibility
You can select one of five options for visibility: Public, Your Institution, Embargo, Lease, Private. If you are not seeing five visibility options, it is likely that your work is set to deposit to an administrative set with fewer visibility options than the default. Visibility only controls who can view or download your work – it does not control editorial permissions. Options for visibility can be restricted if the Admin Set has applied restrictions.
Public makes the work available to the general public. Related metadata is made available to be crawled by search engines for discovery.
Cal State restricts the access to users with login privileges from within the CSU system.
Campus restricts access to users from a specific campus with login privileges, both for works and related metadata. Users will need to be logged into the repository to access the work.
Embargo lets you restrict access to private or institution until a specified date, when it will be opened either to institution or public.
Lease allows access to the work to be opened to public or institution for a limited amount of time, i.e., until a specified date, after which it will be restricted to institution or private.
Private restricts the access to ONLY the person who is uploading the item.
Deposit agreement (required)
The depositor must check the deposit agreement checkbox in order to deposit.
Depositing as a proxy (optional)
Users can designate other users of the system to deposit on their behalf by visiting their dashboard. Once someone has been set as a proxy for another user, the sidebar will offer the option to deposit on behalf of yourself or the other user. If you deposit on behalf of another user, the ownership of the work will automatically be transferred to that user when the deposit completes. Proxies will retain editing privileges to works they deposit unless the owner revokes access.
Add New [Work] Interface: Main Area
The main area in the Add New [Work] interface is organized and navigated around the three top tabs:
Descriptions
Files
Relationships
Descriptions (required)
The “Descriptions” tab is for adding descriptive metadata. At a minimum, you must fill out all of the fields marked “required.” Clicking “Additional Fields” will show more metadata fields, all of which are optional. Each work type has specific metadata requirements for deposit, and these can differ between work types. Requests for additions, deletions, or substitutions of metadata fields should be submitted to the metadata group of the ScholarWorks implementation team.
Files (required)
The “Files” tab is for uploading files, either locally or from a cloud service (e.g. DropBox, Google Drive, Box.com, etc.). You can browse local files to upload, or drag and drop files from your desktop. If your repository is configured to interact with a cloud service, users can click “Browse cloud files” and securely connect to their own Dropbox. They can then browse cloud files to upload. Files can also be removed from the deposit in the “Files” tab. Repositories can be set up for metadata-only works, in this case files are not required. You can select individual files or folders with one or more files to upload simultaneously.
Relationships (optional)
The “Relationships” tab lets you add the work to an Administrative Set or a Collection. Administrative users can add a work to any Administrative Set or Collection in the repository. Regular users are only able to add works to Collections that they have created or collections for which they have been granted a depositor/manager role. The Administrative Set and Collections fields will be automatically populated with options in keeping with the user’s depositor access.
There are two views for works: Browse and Edit. The public-facing view of a work is the Browse view. To access the Edit view, navigate to a work and click the Edit button.
In the Edit view for a work, you can select one of the following tabs: Descriptions, Files, Relationships, and Sharing.
Descriptions tab
Edit, add, or remove metadata elements.
Files tab
If you add files, you must recheck the deposit agreement before saving.
Relationships tab
Select another administrative set from the drop-down menu
Add to a collection, remove from a collection
Add a child work from existing works in repository, deposit a new work as child work (this is only available after the in edit view, not at the time of deposit).
Sharing tab
Share work with users or group and select access level (e.g. view/download, edit)
Edit access for existing users/group with whom work is shared
Remove access for existing users/group with whom work is shared
You can also edit the visibility for the work by selecting a different visibility option. If you edit the sharing or visibility of the work, you can either opt to have all files in the work inherit these permissions, or have the individual files retain their permissions so that they can be edited manually.
To apply the changes, click the Save changes button.
A workflow is a series of review activities for submitted material prior to its public publication. Currently we have three available:
a default workflow, where if a depositor has permissions may publish a work without mediation
a one-step mediated workflow, where a depositor must have the work approved by a reviewer
a two-step mediated workflow, where a depositor must have the work approved by two reviewer groups
Most campuses use the default workflow.
For mediated deposits, a user will deposit to an administrative set with an assigned workflow. For one and two-step mediated workflows, after a user has submitted a work, groups assigned for a review step will receive notifications for changes in activity. They can also access the Review Submissions tab to review the submission status for works deposited in the repository.
The videos below demonstrate a campus manager reviewing, and then requesting additional changes from a depositor.
The depositor has received a notification, makes corrections according to comments, then submits the work back to the campus manager for approval.
Now that the deposit is complete, the reviewer approves the submission.
This completes the workflow for a single step deposit.
For two-step deposits, an additional step may be sent to other groups for final review. This workflow allows for the work to be sent to the first approval group, may add comments, and may also approve the deposit.
Metadata Schemas
Collections
Works can be grouped into collections. Collections can be further sub-divided into sub-collections.
To create a collection, in the ScholarWorks dashboard, go to Repository Contents, Collections, Add New Collection.
Only ScholarWorks administrators can create collections.
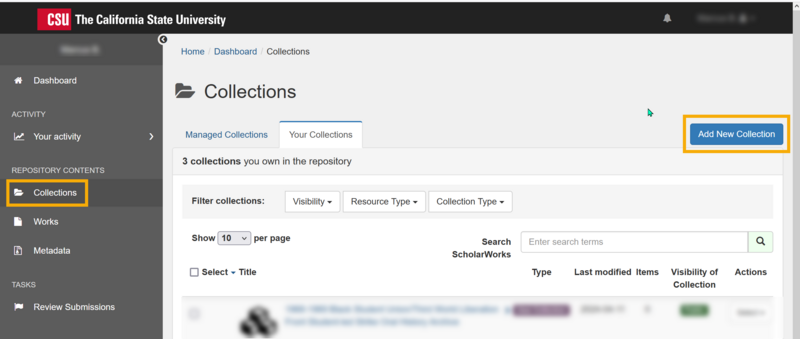
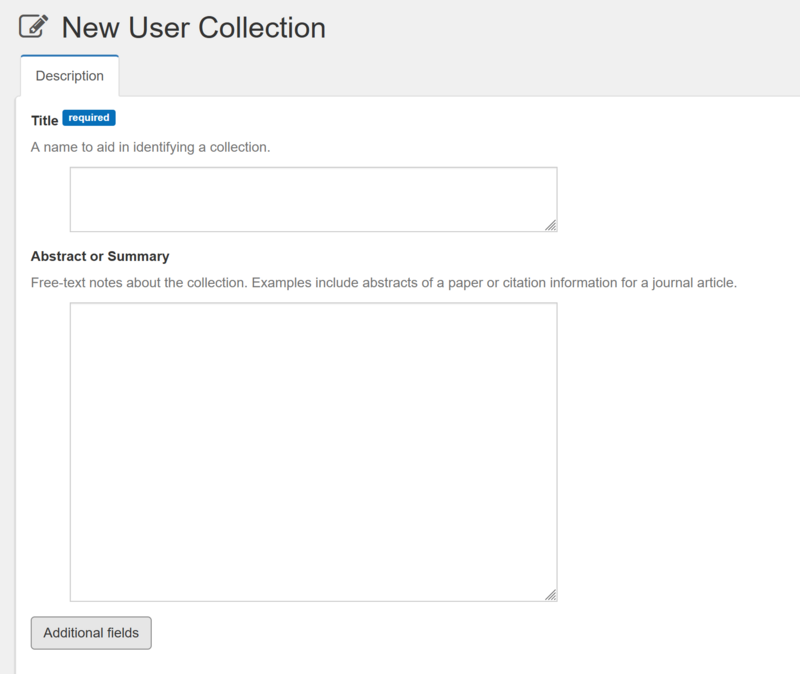
Enter the collection Title.
Abstract/Summary is optional. Additional Fields include a Related URL where you may link to a webpage.
A collection has 4 tabs

Description: Edit collection title, abstract/summary
Branding: Upload a banner, logo image
Discovery: Update the visibility (public, CSU, private) of the collection's home page
Sharing: Add users/collaborators to the collection. Assign roles: manager, depositor
Tip: For campus users to add works to a collection, add your campus user group as a depositor in the sharing tab.
In the screenshot below I'm adding the sanfrancisco user group as depositors to my collection.

Accessibility Formatting
Overview of Adobe Accessibility
PDF files are created as a stable format, and as such are not the easiest or most intuitive to edit. Whenever possible, make files accessible in their original format (Word, PowerPoint, etc.).
Document Structure
Headings provide structure to your document, and allow users to jump to specific sections of your file as well as get a high level overview of the document.
Headings should be hierarchical. The title of your document is Heading 1, main sections of the document are Heading 2, and subsections within those main sections are Heading 3, etc. A book would have the Title as Heading 1, Chapters as Heading 2, sections within the chapters as Heading 3, and list of terms within the subs-sections as Heading 4. It is important not to skip a Heading level. For instance you should not start a chapter (Heading 2) and then go directly into a sub-section (Heading 4). This confuses assistive technology.
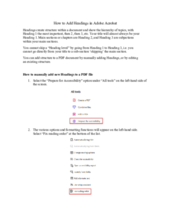
The handout gives instructions on how to add Headings to a PDF file with no Headings and how to edit a document that has some Headings, but may be missing levels or have other structural errors.
Images
Alternate text should be no longer than a sentence or two and describe the image. When deciding what to write as alternate text consider why the image is included in the file and what would be important for a user to know about it. The same image could be described with the alternate text "Four golden retrievers playing in a park" or "Four service dogs completing training." Think carefully about what you are trying to convey in an image rather than trying to describe every element.
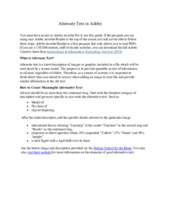
Please see the document below for instructions on how to add alternate text to images in Adobe as well as more information on best practices when creating alternative text.
Tables
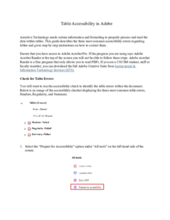
Tables require certain formatting elements to be accessed by assistive technology. In Adobe, tables require a Header Row as well as some descriptive information either in the alt text field (carried over from Microsoft Word) or by including a Table Summary. For best use, tables should be consistent having the same number or columns per row and contain no merged or split cells. Images of tables are not accessible, as screen readers cannot access the data in the image. Please see the step by step instructions below for information on fixing common errors regarding tables.
Google Suite Accessibility Overview
In general, the Google Suite's accessibility tools are inferior to Microsoft products. Google suite's products do not have an accessibility checker, and the accessibility options vary between products (Documents, Sheets, Slides, etc.).
Google Documents are more accessible than they were. Currently, Google Documents supports adding Headings to their documents for structure and adding alternative text to images. However, to make accessible tables you must install an add-on. Google Documents maintain accessibility formatting when converted to Microsoft Word or Adobe Acrobat. However, if a document contains a table it will not have any appropriate accessibility formatting in the PDF.
Google Slides has extremely limited accessibility options. Currently, users can add alternative text to images, but there are no options to allow Headings, or accessible tables, and all accessible formatting is stripped out when converted either to Microsoft PowerPoint or to Adobe PDF.
Google Documents
Adding Headings for Document Structure
You can add structure to your file by adding Headings. There is a drop down option on the top bar labeled "Normal Text" just to the left of the font option. You can change headings by highlighting text and selecting one of the Heading options from the drop down menu.
Image
- The Headings appear to the left side of the screen allowing the user to easily navigate throughout the document.
Add Alternate Text to Image
- You can apply alternate text to images just as you would in Microsoft Word. Right click on the image and select Alt Text from the drop down menu.
- The Alternate Text menu will appear and you can add alternate text for the image and then click "Okay". Remember to keep the alternate text to a sentence or two.
Microsoft Accessibility Checker
Most Microsoft Office products have a tool called the "Accessibility Checker" that checks your file against a set criteria to determine if the file is Accessible or not. This is a good tool, but do not rely exclusively on it to make files accessible as it will not catch every error. To use the Accessibility Checker, go to the "Review" tab on the ribbon and click the "Accessibility Checker" button. You can learn about the accessibility checker from the Microsoft accessibility checker page.
Document Structure
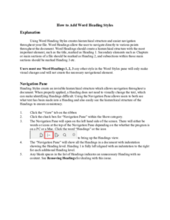
Using Word Heading styles creates hierarchical structure and easier navigation throughout your file. Word Headings should create a consistent, hierarchical structure with the most important element, such as the title, marked as Heading 1. Each document should only have one Heading 1. Secondary elements such as Chapters or main sections of a file should be marked as Heading 2, and subsections within those main sections should be marked Heading 3.
Images
Making images accessible is all about describing what matters in the image in a meaningful way. Creators should define an image using alternate text, which should be no more than two sentences long. As a creator, you are the best person to define what you are communicating by inserting an image in your file. The same image could be described with the alternate text "Four golden retrievers playing in a park" or "Four service dogs completing training." Think carefully about what you are trying to convey in an image rather than trying to describe every element.
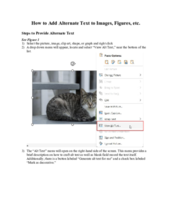
Alternate text does not visually appear on the page, but is placed in a particular field that is accessed by assistive technology. If you have a complex image that cannot be described in a sentence or two, type out the full description underneath the image. You can then put "Full description below image" in the alternate text field. This is especially important if you need to take a screenshot or insert an image that includes text. As a rule, if there is more than two sentences of text, which could be placed in the alternate text field, you should transcribe the text from the image under the picture in a full description. Otherwise you are not making your file fully accessible.
Manually double check each image's alternate text field, as file names and junk data sometimes get placed in this field fooling the Accessibility Checker tool.
Tables
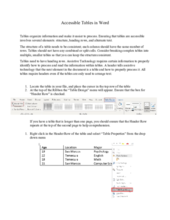
Tables are used to organize information in meaningful categories. You should never insert an image of a table as this prevents assistive technology from accessing the data in the table. Keep these tips in mind when creating tables in your documents.
- Keep tables simple. Each row should have the same number of columns
- Make sure each table has a defined Header Row
- Describe the data or table using the Alternate Text section of the Tables Properties menu
- Place your cursor in the top left cell of the table and hit tab. This shows how a screen reader will process the table. Make sure that no cells are skipped.
Other Word Accessibility Elements
Word is a great tool that allows wide versatility in creating documents. Here are some other things to keep in mind to create accessible documents!
- Be wary of using "Smart Art" this tool layers text and images in a way that confuses assistive technology. Best practice is to use a table for the text/data.
- Remember color contrast! Many users have difficulty distinguishing between colors or may have color blindness. Do not rely only on color to make a point such as color coding paragraphs or steps in instructions and giving no other organizational clues. If you get creative with text or background color use the Colour Contrast Checker to make sure your text is legible.
- Double check that your images have meaningful alternate text. File names or other random text may can be placed in the "alternate text" field which prevents the Accessibility Checker from identifying an error. Manually check all of your images to ensure there is meaningful alternate text.
Below is a document explaining a few Word tools and their usefulness is creating accessible documents.
Document Word Tricks and Tips.pdf(PDF, 535.59 KB)
Overview
Microsoft PowerPoint is an image rich program intended to build eye catching slides which often incorporate figures of all kinds. When creating PowerPoint presentations, think carefully when relying on visual elements such as color, or complex infographics that would be difficult to describe with alternative text.
The website WebAIM generally addresses website accessibility, however it does give a solid overview of accessibility for the program Microsoft PowerPoint. Please note that in the 365 version of PowerPoint the "Check Accessibility" tool is found under the "Review" tab for both Mac and PC computers.
Images
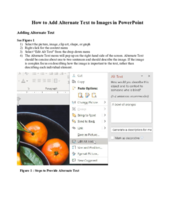
PowerPoint can include design factors that may not seem like images such as colorful backgrounds, geometric or graphic elements, and even lines separating sections of a slide. All images need to be defined by Alternate text. Alternate text should only be a sentence or two long, and should describe what is important about the image. Think carefully about what you are trying to convey in an image rather than trying to describe every element. Three things to remember when making images accessible in PowerPoint.
- ALL images require either alternate text or designation as a 'decorative image'
- Check each image to ensure junk text isn't in the 'Alternate Text' field and tricking the Accessibility Checker.
- Always confirm autogenerated alternative text suggestions made by the Accessibility Checker. These suggestions are often limited and do not accurately describe images.
Tables
Tables in PowerPoint cannot be images. Due to the small spacing issues it can be tempting to take a screen shot and shrink the table until it fits, however, if you use an image of a table none of the data will be accessible. Like other accessible tables, in PowerPoint you will need to ensure that each table has an appropriate Header Row to identify the table to assistive technology. For full instructions, and additional information please see the Accessible Tables in PowerPoint.
Document Structure
Ensure that each slide has a unique "Slide Title", most of the standard options for slide structure have a segment to include the slide title. These titles serve as the Headings structure as explained in the Microsoft Word and Adobe PDF tabs. It is important that every slide has a title so that sections aren't skipped and that each slide has a unique title so that users can correctly identify the specific information they need. For example instead of using "References continued" for each subsequent slide of references, consider numbering them as "References 1, References 2, etc."
Converting to PDF
If you are converting your PowerPoint slides into another format, such as a PDF, please be aware that some accessibility aspects can transfer messily. For instance, text boxes and slide titles in your slides can be converted to images in the PDF. These accessibility errors will need to be corrected in Adobe.
Additionally, if you have speaker notes in your PowerPoint slides, when you save a file as a PDF you will get the warning "Would you like to convert this presentation's speaker notes to text annotations in the PDF? The annotations will be created on a separate layer that can be toggled on or off." Select "No", as transferring the speaker notes will create accessibility issues.
Resources
Glossary
ScholarWorks Glossary
A guide to common terms, phrases, and acronyms for working in the CSU Institutional Repository: ScholarWorks.
Access Restriction Options: When you submit your file(s), you will have the option of selecting its degree of Visibility within ScholarWorks, which will control who can access your materials. You can also select to restrict access to your work for a certain time period. Certain license terms apply to each option:
Visibility Level: PUBLIC: By choosing the Public option you are allowing anyone in the world to view your submission.
Visibility Level: CSU: If you select the CSU access option, you have decided to restrict access only to users of CSU networks. Your deposit will not be accessible to colleagues or students at other universities or to members of the public. If you want your work to be accessible to the broader scholarly community, you should consider the regular Public option instead. If you choose, you may also further limit access to specific individuals or groups of individuals at the CSU.
Visibility Level: CAMPUS: If you select the Campus access option, you have decided to restrict access only to users of your campus. Your deposit will not be accessible to colleagues or students at other universities or to members of the public. If you want your work to be accessible to the broader scholarly community, you should consider the regular Public option instead. If you choose, you may also further limit access to specific individuals or groups of individuals at the CSU.
Visibility Level: PRIVATE: If you have selected the PRIVATE access option in the ScholarWorks deposit process, you have decided to allow the CSU a more limited set of rights than those afforded under the Public license option. Whether your deposit will be entirely private is dependent upon the policies adopted by your campus for self-submission. If your campus employs unmediated self-submission only you and those with CSU systemwide administrator permissions will be able to view your deposit. If your campus uses either a mediated self-submission or uploads the file on your behalf, your deposit will be accessible to your campus ScholarWorks project manager and those with CSU systemwide permissions. To determine which system your campus employs, please contact your campus project manager. If you want your work to be accessible to the broader scholarly community, you should consider the regular Public or the CSU settings instead.
Embargo: Restricting access to an item and removing it from public access, usually for a set period of time. Embargoes in ScholarWorks can limit the access completely (AKA “private”), limit the access to members of the CSU community (the end user will need to be logged in to get access), or to your specific campus community.
Ingest: Uploading materials into ScholarWorks. Depending on the workflow, ingested material may be immediately available under selected visibility settings, or it can require approval by administrators before being made visible in the repository.
Lease: If you select the Lease option, you have decided to place a time limit on wider access to your deposit by indicating a date at which the access level will be reduced from its initial setting. The level of access for that initial time period will depend on the visibility level that you have chosen, with the options being either Public, CSU community or your specific campus community. On the specified date, access will be reduced to either the CSU community, your campus, or only you (the Private setting), depending on the option you select. If you want your work to remain accessible to the broader scholarly community, you should consider the Public setting instead.
Privacy: Privacy or visibility determines who may view a work and/or its metadata. Access restrictions may vary from private (only the depositor and repository administrators may access) to public (anyone with internet access can access).
Restricted: Restricted works are not fully public and have some limitations on their visibility that impact who is able to access or discover them. These can include private works (available to depositors and ScholarWorks administrators only), leased works that may be subject to restrictions at a later date, embargoed works (works with limited access for a set period of time), or works limited to Campus or Cal State authenticated users.
Workforms: Workforms are the five current templates available in ScholarWorks to upload/ingest materials into ScholarWorks. The available workforms are: Master's Thesis or Dissertation, Presentation, Publication, Dataset, and Open Educational Resource.
Campus Project Managers
| Campus | Contact | |
Bakersfield | Chris Livingston | |
Channel Islands | Sebastian Hunt | |
Chico | Pam Kruger | |
Dominguez Hills | Dana Ospina | |
East Bay | John Wenzler | |
Fresno | Renaldo Gjoshe | |
Fullerton | Michaela Keating | |
Humboldt | Brianne Hagen | |
| Long Beach | TBD | |
| Los Angeles | Ken Herold | kherold2@calstatela.edu |
| Maritime | Mark Stackpole | mstackpole@csum.edu |
| Moss Landing | Katie Lage | kathryn.lage@sjsu.edu |
| Northridge | Elizabeth Altman | elizabeth.altman@csun.edu |
| Pomona | Ryan Rush | rrrush@cpp.edu |
| Sacramento | Bin Zhang | bzhang@csus.edu |
| San Francisco | Matthew Martin | matter@sfsu.edu |
| San Marcos | Carmen Mitchell | cmitchell@csusm.edu |
| Sonoma | Julie Dinkins | dinkins@sonoma.edu |
| Stanislaus | Annie Hor | ahor@csustan.edu |
Authentication only
| Campus | Contact | |
| Monterey Bay | Ryne Leuzinger | rleuzinger@csumb.edu |
| San Bernardino | Stacy Magedanz | magedanz@csusb.edu |
| San Diego | Keven Jeffery | kjeffery@sdsu.edu |
| San Jose | Michah Jeffries | michah.jeffries@sjsu.edu |
| San Luis Obispo | TBD |
Reports and Historical Documentation
Rights Checking Information
- It is the responsibility of the depositor/campus to ensure that all materials added to ScholarWorks comply with copyright law.
- Each type of work has a “License” and “Rights Note” fields to record necessary information regarding rights and permissions. “License” has a drop down list of Creative Commons licenses while Rights Note is a free text field for required statements or other necessary information.
- Journal Permission checking https://www.sherpa.ac.uk/romeo/ and https://shareyourpaper.org/permissions
